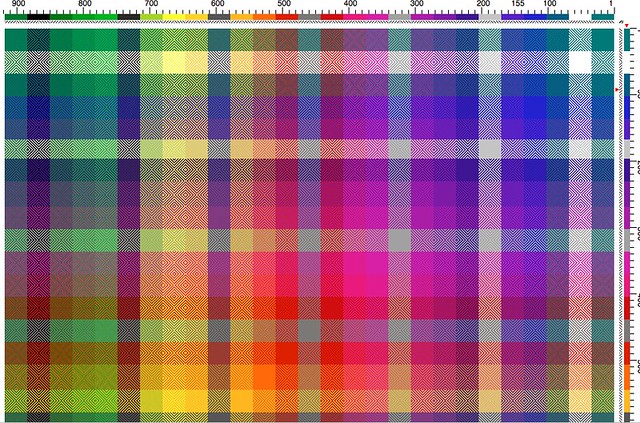
Gamp warp
The next chapter in the story about the G-A-M-P, Gamp is about warping the loom.
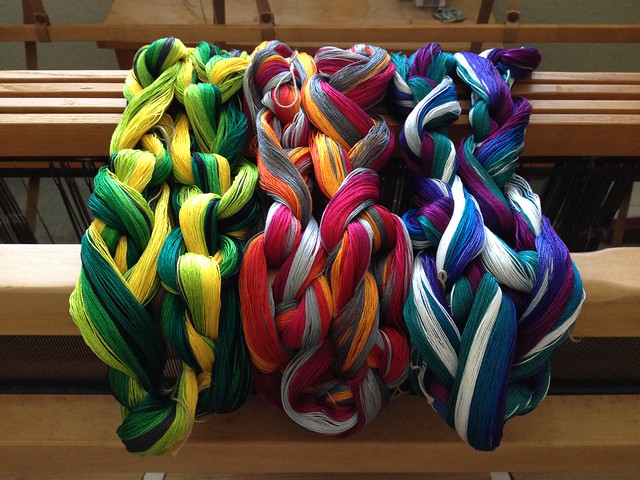
The warp was 5 yards long with 34 ends of each of the 27 colors plus 2 ends at each outer edge for floating selvedges. Let's see... ((27 colors * 34 ends) + 4 floating selvedge ends) * 5 yards = 2.6 miles. Well, that's a good amount of yarn, isn't it? But someone once explained to me that the warp is 1/2 of the project, so once you get the loom dressed, you're 50% finished. That always makes the task sound better to me.
If only it was this easy
I warped the loom from Front to Back using Madelyn van der Hoogt’s instructional video, Warping Your Loom. I find this technique works well for me and it will continue to be my primary method, at least until I get or make a raddle. So I started out with sleying the reed. Looking at the time stamps of these photos, this took me 2 days. Granted this was over Memorial Day weekend so I had another day off to do the mundane household chores, otherwise the elapsed time would have been at least a week.
1/3 sleyed
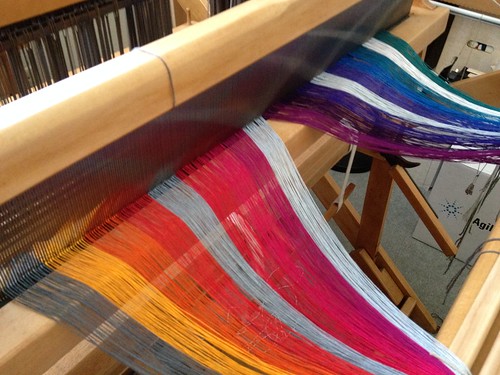
2/3 sleyed
922 ends sleyed
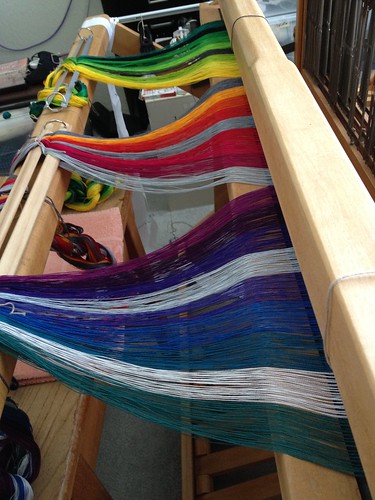
After 2 days of getting all those pesky ends through the reed (12dpi, 2 ends per dent for the weavers in the crowd), it was time to figure out how many heddles I had and make sure I had enough on each frame. I probably should have done that earlier because in the event that I didn't have enough, I would have had to order more. Well, it turned out that I had enough heddles with a few to spare. I redistributed the heddles on the loom so I wouldn't run out on any of the frames and threaded the heddles. I divided each color into 4 groups with 8, 9, 8, and 9 ends each. Each group was double checked for threading errors and then it was knotted.
Again, checking the time stamp of the photo I see that the time elapsed from when I sleyed the reed to when the heddles were threaded was just 1 week. That surprises me, I thought it took longer.
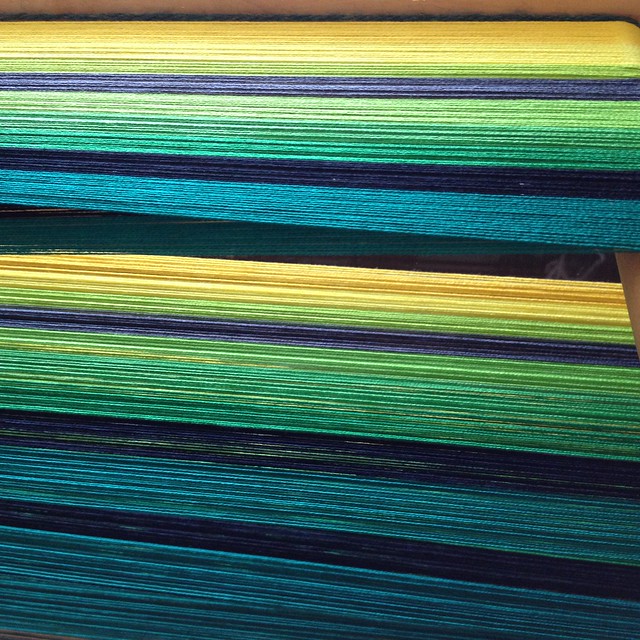
Color gamp warp
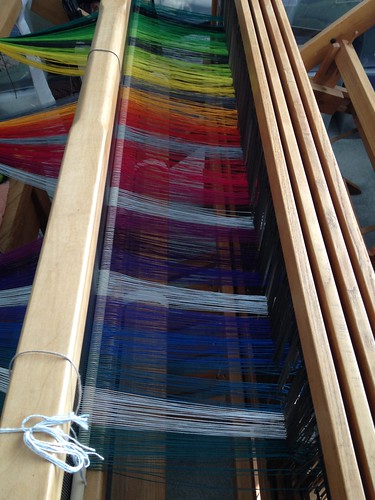
The next step was to tie the ends to the back apron rod and do what's called crank & yank. Funny, huh? You basically turn a crank which pulls the warp threads through the heddles and the reed and winds it onto the back warp beam. It's a slow process because you crank a little bit, then come back to the front and pull on groups of warp threads to even out the tension (yank). After most of the 5 yards is wound onto the back of the loom, the free ends are tied onto the front apron rod.
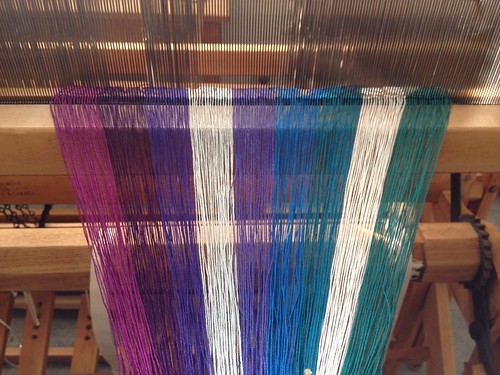
Color gamp warp
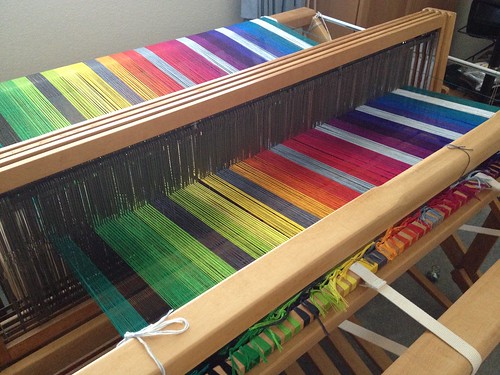
Now the loom is dressed and weaving can begin! Actually I consider all of the above weaving, but you know what I'm saying. Once you start weaving cloth, the pattern is visible and you can see if there are mistakes in the warp that need to be fixed. But that's why I checked every group of 8 or 9 warp threads to make absolutely positively sure that there wouldn't be any issues and I could start weaving right away. Well, it didn't turn out that way.
I started with some tabby weave or in other words, just some plain over-under weaving. In the picture below, you can see where there is a threading mistake. There's a group of 3 magenta warp threads that are moving together. What should be happening is the thread in the middle of the group of three should be moving up when the outer two move down, and down when the other 2 move up.
0.1%
It wasn't a huge mistake and it was the only one I found in 922 threads, so that was actually pretty good. Basically, I mistakenly threaded the middle warp thread through a heddle on the wrong frame. To fix it, I had to untie that group of magenta threads from the front apron rod and rethread that one thread through a heddle on the correct frame. The only problem with that was I didn't have a heddle in that position on that frame. Madelyn van der Hoogt to the rescue! In her video, Weaving Well, Madelyn describes how to make a heddle out of string for just this purpose. Done and done.
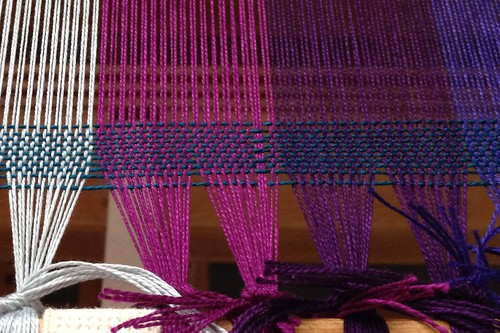
Here's the fixed warp, the plain weave with hemstitching in blue, and the first color stripe woven in point twill in teal.

Color gamp
I'm finding that getting the right number of picks per inch (density of weft threads) is tricky. If I beat the weft too hard, the weft threads are too close together and the squares of color end up being short fat rectangles. If I don't beat hard enough, the squares end up as tall rectangles. So getting that just right AND having neat selvedges (edges) is my challenge now. I'll weave a color stripe find a number of things wrong with it, then I'll unweave and reweave it. Having a critical eye can be a pain, but some of the issues I've fixed are things I would notice forevermore, so for me it's better to take the time to rework them. With that, you don't need to leave any comments about galloping horses.
The warp was 5 yards long with 34 ends of each of the 27 colors plus 2 ends at each outer edge for floating selvedges. Let's see... ((27 colors * 34 ends) + 4 floating selvedge ends) * 5 yards = 2.6 miles. Well, that's a good amount of yarn, isn't it? But someone once explained to me that the warp is 1/2 of the project, so once you get the loom dressed, you're 50% finished. That always makes the task sound better to me.
If only it was this easy
I warped the loom from Front to Back using Madelyn van der Hoogt’s instructional video, Warping Your Loom. I find this technique works well for me and it will continue to be my primary method, at least until I get or make a raddle. So I started out with sleying the reed. Looking at the time stamps of these photos, this took me 2 days. Granted this was over Memorial Day weekend so I had another day off to do the mundane household chores, otherwise the elapsed time would have been at least a week.
1/3 sleyed
2/3 sleyed
922 ends sleyed
After 2 days of getting all those pesky ends through the reed (12dpi, 2 ends per dent for the weavers in the crowd), it was time to figure out how many heddles I had and make sure I had enough on each frame. I probably should have done that earlier because in the event that I didn't have enough, I would have had to order more. Well, it turned out that I had enough heddles with a few to spare. I redistributed the heddles on the loom so I wouldn't run out on any of the frames and threaded the heddles. I divided each color into 4 groups with 8, 9, 8, and 9 ends each. Each group was double checked for threading errors and then it was knotted.
Again, checking the time stamp of the photo I see that the time elapsed from when I sleyed the reed to when the heddles were threaded was just 1 week. That surprises me, I thought it took longer.
Color gamp warp
The next step was to tie the ends to the back apron rod and do what's called crank & yank. Funny, huh? You basically turn a crank which pulls the warp threads through the heddles and the reed and winds it onto the back warp beam. It's a slow process because you crank a little bit, then come back to the front and pull on groups of warp threads to even out the tension (yank). After most of the 5 yards is wound onto the back of the loom, the free ends are tied onto the front apron rod.
Color gamp warp
Now the loom is dressed and weaving can begin! Actually I consider all of the above weaving, but you know what I'm saying. Once you start weaving cloth, the pattern is visible and you can see if there are mistakes in the warp that need to be fixed. But that's why I checked every group of 8 or 9 warp threads to make absolutely positively sure that there wouldn't be any issues and I could start weaving right away. Well, it didn't turn out that way.
I started with some tabby weave or in other words, just some plain over-under weaving. In the picture below, you can see where there is a threading mistake. There's a group of 3 magenta warp threads that are moving together. What should be happening is the thread in the middle of the group of three should be moving up when the outer two move down, and down when the other 2 move up.
0.1%
It wasn't a huge mistake and it was the only one I found in 922 threads, so that was actually pretty good. Basically, I mistakenly threaded the middle warp thread through a heddle on the wrong frame. To fix it, I had to untie that group of magenta threads from the front apron rod and rethread that one thread through a heddle on the correct frame. The only problem with that was I didn't have a heddle in that position on that frame. Madelyn van der Hoogt to the rescue! In her video, Weaving Well, Madelyn describes how to make a heddle out of string for just this purpose. Done and done.
Here's the fixed warp, the plain weave with hemstitching in blue, and the first color stripe woven in point twill in teal.
Color gamp
I'm finding that getting the right number of picks per inch (density of weft threads) is tricky. If I beat the weft too hard, the weft threads are too close together and the squares of color end up being short fat rectangles. If I don't beat hard enough, the squares end up as tall rectangles. So getting that just right AND having neat selvedges (edges) is my challenge now. I'll weave a color stripe find a number of things wrong with it, then I'll unweave and reweave it. Having a critical eye can be a pain, but some of the issues I've fixed are things I would notice forevermore, so for me it's better to take the time to rework them. With that, you don't need to leave any comments about galloping horses.